Understanding Signature Select Ham
Signature SELECT hams are fully cooked, offering convenience for holiday meals or any occasion; they require reheating, not initial cooking, simplifying preparation significantly.
What is Signature Select Ham?
Signature Select ham represents a popular choice for consumers seeking a convenient and flavorful centerpiece for meals, particularly during holidays. These hams are pre-cooked, meaning the primary step isn’t cooking, but rather reheating to a safe and enjoyable temperature. Available at Albertsons companies stores, including Safeway and Shaw’s, they offer various options like spiral-cut, boneless, and bone-in varieties.
The brand emphasizes quality and ease of preparation, often including a glaze packet for added sweetness and visual appeal. A 10lb spiral-cut ham with natural juices is a common offering, designed to be ready to serve after a relatively short reheating period, typically around 2 hours and 10 minutes.
Types of Signature Select Ham Available
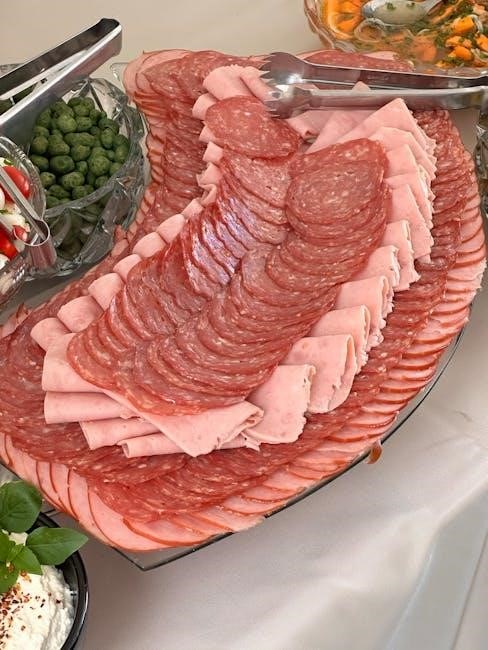
Signature Select offers a diverse range of hams to suit different preferences and meal sizes. You’ll commonly find spiral-cut hams, known for their easy serving and even glaze distribution, alongside traditional bone-in hams providing richer flavor during reheating. Boneless hams are also available, simplifying carving and portioning.
Variations extend to flavor profiles, including smoked and honey-flavored options. A popular choice is the Cooked Smoked Honey Boneless Ham Half, weighing around 2lbs, ideal for smaller gatherings. Regardless of the type, all Signature Select hams are pre-cooked, requiring only reheating instructions for a delicious meal.
Preparing for Cooking
Before reheating, confirm your Signature Select ham’s weight and whether it’s bone-in or boneless, as cooking times vary significantly based on these factors.
Checking the Ham’s Weight and Type
Accurately determining your Signature Select ham’s weight is crucial for calculating the appropriate reheating time; hams range from smaller halves to larger whole pieces, impacting cooking duration. Distinguishing between bone-in and boneless hams is equally important, as boneless varieties generally require less time to heat through. A typical pre-cooked, boneless ham weighs between 6 and 12 pounds, while bone-in options can be considerably heavier. Refer to the packaging for precise weight details. Knowing the type—spiral-cut or not—also influences glazing timing. Always prioritize checking these details before beginning, ensuring a perfectly heated and flavorful ham for your meal. Proper assessment leads to optimal results!
Essential Tools and Equipment
Successfully reheating your Signature Select ham requires minimal, yet essential, tools. A roasting pan is paramount, providing a stable base and containing any drippings. Aluminum foil is crucial for covering the ham during initial heating, retaining moisture and preventing excessive browning. A reliable meat thermometer is non-negotiable, ensuring the ham reaches a safe internal temperature of 140°F. A small saucepan will be needed if you’re preparing a glaze from scratch or warming the included glaze packet. Finally, carving tools – a sharp knife and carving fork – are necessary for elegant serving. These simple items guarantee a delicious outcome!
Cooking Methods
Signature Select hams are best reheated using oven baking, a standard and reliable method, or slow cooking for a more intensified, flavorful result.
Oven Baking: The Standard Approach
Oven baking remains the most popular method for reheating a Signature Select ham, ensuring even heating and a delightful presentation. Begin by preheating your oven to 275 degrees Fahrenheit. Place the ham, cut-side down if spiral-cut, in a roasting pan. Adding about half an inch of water to the pan helps maintain moisture during the reheating process, preventing the ham from drying out.
Cover the pan tightly with aluminum foil to trap steam and further enhance moisture retention. Bake for approximately 12-15 minutes per pound, checking periodically. About half an hour before the estimated completion time, remove the foil to allow the glaze to set beautifully. This method delivers a consistently warm and flavorful ham, perfect for any gathering.
Slow Cooking for Enhanced Flavor
For a truly exceptional ham experience, consider slow cooking! While already fully cooked, this method infuses deeper flavor and creates incredibly tender results; Place your Signature Select ham in a slow cooker, adding about a cup of liquid – apple juice, pineapple juice, or even ginger ale work wonderfully.
Cover and cook on low for 4-6 hours, or on high for 2-3 hours. The extended, gentle heat allows the flavors to meld beautifully. About 30 minutes before serving, generously brush with your favorite glaze. This slow cooking approach yields a remarkably moist and flavorful ham, guaranteed to impress your guests with its succulent tenderness.
Temperature and Time Guidelines
Reheat Signature Select ham at 275°F for 12-15 minutes per pound, ensuring it reaches an internal temperature of 140°F for safety.
Heating Time per Pound (Bone-In Ham)
When reheating a Signature Select bone-in ham, allocate approximately 18 to 25 minutes of heating time for each pound of weight. This timeframe ensures the ham warms thoroughly without drying out, maintaining its juicy texture and delicious flavor. Remember that these are estimates, and actual cooking times can vary based on your oven’s calibration and the ham’s initial temperature.
Consistent monitoring with a meat thermometer is crucial; aim for an internal temperature of 140°F. For a larger, 10-pound bone-in ham, expect a total reheating duration of around 3 to 4 hours. Always prioritize reaching a safe internal temperature over strictly adhering to the time guidelines.
Heating Time per Pound (Boneless Ham)
For Signature Select boneless hams, the reheating process requires a slightly longer duration per pound compared to bone-in varieties. Plan for approximately 24 to 35 minutes of heating time for each pound of weight. This extended time is necessary because boneless hams tend to dry out more quickly, needing a gentler, slower reheating approach.
As with bone-in hams, oven calibration and initial temperature play a role. A meat thermometer is essential; aim for an internal temperature of 140°F. A 6 to 12-pound boneless ham will likely require 2.5 to 7 hours to reheat properly, ensuring it’s warm and flavorful throughout.
Internal Temperature for Safety
Ensuring your Signature Select ham reaches a safe internal temperature is paramount for food safety and optimal enjoyment. While these hams are pre-cooked, reheating to 140°F (60°C) is crucial to eliminate any potential bacteria and guarantee a delicious, worry-free meal. Always use a reliable meat thermometer inserted into the thickest part of the ham, avoiding the bone.

This temperature ensures the ham is heated through without becoming overly dry. Consistent monitoring throughout the reheating process is vital. Remember, color is not a reliable indicator of doneness; rely solely on the thermometer reading for a safe and satisfying result.
Glazing Your Signature Select Ham
Applying glaze during the final 30 minutes of heating creates a beautiful, flavorful crust; both homemade brown sugar glazes and included glaze packets work well.
When to Apply the Glaze
Timing is crucial for a perfect glaze! Generally, you should apply the glaze to your Signature Select ham approximately 30 minutes before the end of the total heating time. This allows the sugars in the glaze to caramelize beautifully, creating a lovely, glossy finish and a delightful sweetness. Applying it too early risks burning the glaze before the ham is fully heated through.
Removing the ham from the oven about half an hour before the scheduled finish allows ample time for glaze application and subsequent baking. This ensures a sticky, flavorful coating without a charred exterior. Remember to brush the glaze on evenly for consistent results, and consider reapplying a second coat halfway through the glazing period for an even richer flavor!
Making a Simple Brown Sugar Glaze
Creating a homemade brown sugar glaze is remarkably easy and elevates your Signature Select ham! Begin with approximately one cup of packed brown sugar as a base. To this, add a quarter cup of honey or maple syrup for extra depth of flavor and stickiness. A tablespoon of Dijon mustard introduces a subtle tang that balances the sweetness beautifully.
For a hint of spice, incorporate a quarter teaspoon of ground cloves or cinnamon. Combine all ingredients in a small saucepan and heat gently over medium heat, stirring constantly until the sugar dissolves and the glaze is smooth. This simple glaze delivers a classic, irresistible flavor profile!
Glaze Packet Instructions
If your Signature Select ham includes a glaze packet, application timing is crucial for optimal results. Remove the ham from the oven approximately 30 minutes before the anticipated end of the heating time. Empty the entire contents of the glaze packet into a small saucepan. Add 1 ½ teaspoons of water to help dissolve and create a smoother consistency.
Heat the glaze over medium-low heat, stirring constantly, until it’s fully melted and slightly thickened. Brush the warm glaze evenly over the surface of the ham, ensuring complete coverage. Return the ham to the oven for the final 30 minutes of baking to allow the glaze to caramelize.
Serving and Storage
Allow the cooked ham to rest for at least 15 minutes before carving, ensuring juicy slices; store leftovers promptly in airtight containers for optimal freshness.
Resting Time After Cooking
Allowing your Signature Select ham to rest after cooking is a crucial, often overlooked, step that significantly impacts the final result. A resting period of at least 15 minutes, and potentially longer for larger hams, allows the juices to redistribute throughout the meat. This redistribution prevents the ham from becoming dry when carved, resulting in incredibly moist and flavorful slices.
During cooking, the heat forces the juices towards the center of the ham. Resting allows these juices to flow back into the muscle fibers, ensuring even moisture distribution. Tent the ham loosely with foil during this resting phase to maintain warmth without continuing the cooking process. Don’t skip this step – it’s key to a perfect ham!
Proper Carving Techniques
Carving a Signature Select ham, especially a spiral-cut variety, requires a sharp carving knife and a bit of technique. Begin by placing the ham on a carving board with the flat side down for stability. For spiral-cut hams, simply follow the existing cuts, slicing downwards to create individual portions.
If carving a whole ham, start by slicing against the grain to ensure tenderness. Thin, even slices are ideal. For bone-in hams, carefully carve around the bone, following its contours. Remember to remove any remaining meat clinging to the bone – it’s often the most flavorful part! Present your beautifully carved ham for a delightful dining experience.
Storing Leftover Ham
Properly storing leftover Signature Select ham is crucial for maintaining its quality and ensuring food safety. Within two hours of cooking, remove the ham from the bone and store it in airtight containers or tightly wrapped in plastic wrap. Refrigerate promptly; leftover ham will generally stay fresh for 3-4 days.
For longer storage, consider freezing. Ham can be frozen for up to 1-2 months. When thawing, do so in the refrigerator to prevent bacterial growth. Utilize leftover ham creatively in soups, sandwiches, omelets, or casseroles to minimize waste and enjoy its delicious flavor.
Troubleshooting
If the ham dries out, baste frequently with pan juices or add a little broth; a burning glaze indicates the oven temperature is too high.
Ham is Drying Out
A common concern when reheating a pre-cooked ham, especially a spiral-cut variety, is preventing it from becoming dry. Since Signature Select hams are already fully cooked, the goal isn’t to cook through, but to gently warm and maintain moisture. To combat dryness, frequent basting is key! Utilize the natural juices accumulating in the roasting pan, spooning them generously over the ham’s surface every 20-30 minutes.
Alternatively, adding a small amount of liquid – perhaps a cup of chicken or vegetable broth – to the bottom of the roasting pan creates steam, helping to keep the ham moist. Covering the ham loosely with foil for the majority of the heating time, then removing it during the last 30 minutes to allow the glaze to set, is also beneficial.
Glaze is Burning
If you notice your Signature Select ham’s glaze is browning too quickly or beginning to burn, immediate action is needed! High sugar content in many glazes makes them prone to scorching. Reduce the oven temperature by 25 degrees Fahrenheit. Shielding the ham with a loose tent of aluminum foil will also deflect heat and slow down the browning process.
Remember to apply the glaze during the final 30 minutes of heating, rather than from the beginning. Frequent monitoring is crucial. If using a glaze packet, ensure it’s evenly distributed, avoiding thick build-up in certain areas. A slightly under-glazed ham is preferable to a burnt one!

Safety Considerations
Ensure the internal temperature reaches 140°F for safe consumption. Properly handle cooked ham, preventing cross-contamination, and refrigerate leftovers promptly to avoid bacterial growth.
Food Safety Temperatures
When reheating your Signature SELECT ham, achieving the correct internal temperature is paramount for food safety. While these hams are pre-cooked, they still require sufficient heat to eliminate any potential bacteria. The USDA recommends heating the ham to an internal temperature of 140°F (60°C) as measured with a food thermometer.
Insert the thermometer into the thickest part of the ham, avoiding the bone. Consistent monitoring throughout the reheating process is crucial. Remember, color is not a reliable indicator of doneness; always rely on a thermometer reading. Maintaining this temperature ensures a safe and enjoyable dining experience for you and your guests, preventing foodborne illnesses.
Handling Cooked Ham
After enjoying your Signature SELECT ham, proper handling of leftovers is essential to prevent foodborne illness. Refrigerate cooked ham within two hours of removing it from the oven, storing it in shallow containers to facilitate rapid cooling. Consume refrigerated ham within 3-5 days for optimal quality and safety.
When reheating leftover ham, ensure it reaches an internal temperature of 165°F (74°C). Avoid cross-contamination by using separate cutting boards and utensils for cooked and raw foods. Proper storage and reheating practices guarantee a safe and delicious experience with your leftover ham, extending its enjoyment beyond the initial meal.